Page Last Updated on 2025-10-14
New for Version 25.2
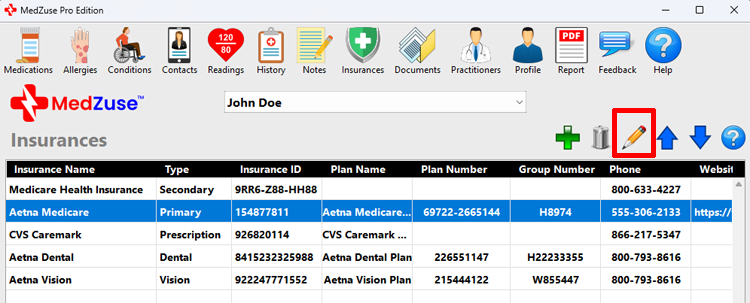
How to Edit an Insurance on the Insurances List
Step 1: On the Insurances screen, select the Insurance in the list to be edited. Then click the Edit Selected Row button (the pencil icon). The Insurance Record screen will appear.
Tips:
- Alternatively, you can press the Enter key on the keyboard while the row is selected to edit the record.
- Or you can use the mouse to double-click on the row to edit the record.
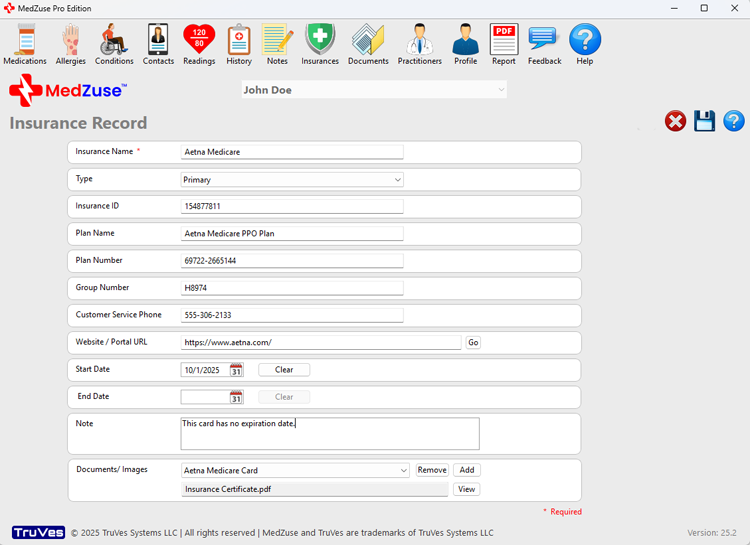
Step 2: On the Insurance Record screen, the following fields are available:
- Insurance Name (Required)
- Insurance ID
- Plan Name
- Plan Number
- Group Number
- Customer Service Phone
- Website / Portal (Optional – Must be a valid URL)
- Start Date
- End Date
- Note
- Documents / Images
Tip: Use the scrollbar or resize the window to view all fields.
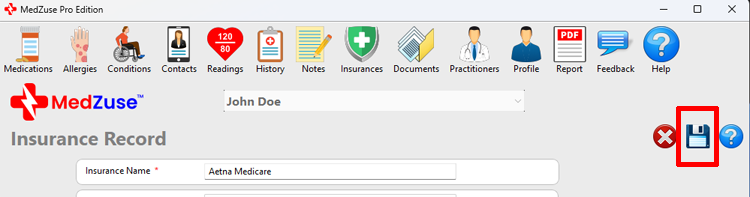
Step 3: After editing the desired fields, on the right-hand side of the Insurance Record screen, click on the Save Record button to save the record.
See also
- Change the Sort Order of a Record in a List
- Delete a Record in a List
- Delete Multiple Records in a List