Page Last Updated on 2025-06-18
The BPTrakr Data File (.bpt) is the default and recommended data file used for Importing and Exporting blood pressure records for both the Free Edition and the Pro Edition of BPTrakr.
How to import a BPTrakr Data File
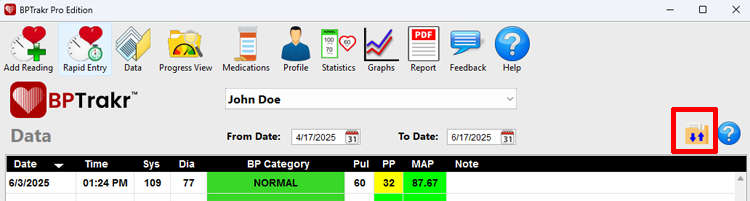
Step 1: Select the username for the data to be imported.

Step 2: On the Data screen, click on the Import / Export Data button. The import/export data window will then appear.
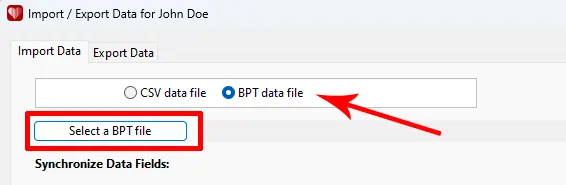
Step 3: On the import/export data window, if it is not already selected, click on the Import Data tab. Select the BPT data file option, then click on the Select a BPT file button. A Select a BPTrakr Data (.bpt) File window will appear.
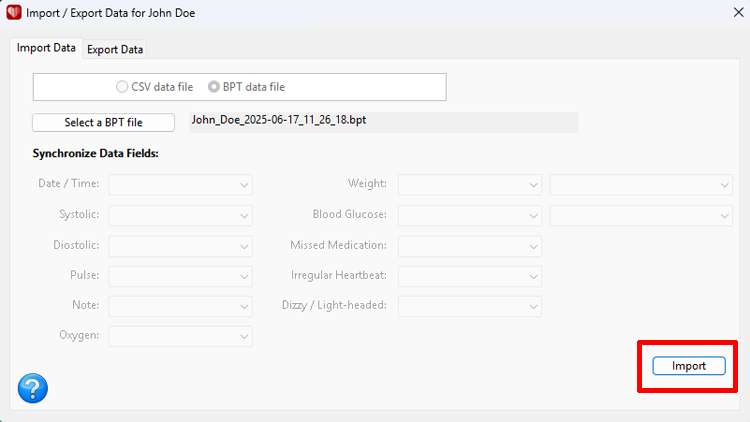
Step 4: On the Select a BPTrakr Data (.bpt) File window, navigate to the location of the BPTrakr Data File that you want to import. Then click on the data file to select it. While the file is selected, click on the Open button. The data file will be loaded into BPTrakr Import/Export Data window.

Step 5: Click on the Import button.
Special Note: If you are importing a CSV data file that was NOT created by BPTrakr, then you will need to synchronize the data fields in this step. Use the drop-down lists to synchronize the data fields. For each data field, match the data field name to the appropriate column header name in the drop-down list. For example, the best match for the data field Note is the column header name Comment. For the Weight field, it is important to select either Kilograms or Pounds that appropriately matches the data type in the Weight field. Also for the Blood Glucose field, it is important to select either Milligrams per Decilitre or Millimoles per Litre that appropriately matches the data type in the Blood Glucose field. Also note that it is possible that not all fields will be available for import, depending on the data available in CSV data file that you are importing.
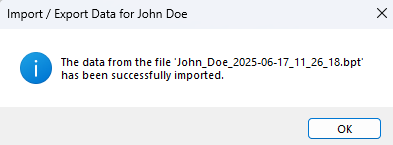
You have successfully imported a BPTrakr data file!
See also
Comments / Questions